Nonograms, commonly known as ‘Picross’, is a puzzle game in the family of Sudoku. The objective is to correctly fill in the grid according to the clues. Spaces will either be empty or filled, and when all of the squares are correctly set, you will have won, revealing the picture.
None of the puzzles on the Swadge picross game require guessing in order to solve. In other words (if one doesn’t make a mistake) a next step towards the solution can always be logically deduced from the given clues. Additionally, every puzzle has a single unique solution.
The yellow lines are every 5 squares, and only there to help you count.
Input
Move the blue input square with the d-pad. Hold the cursor to auto-move.
- Press A to toggle spaces as filled.
- Press B to mark which spaces are empty. This is for note-taking, and isn’t required for the solution.
- Press START to reset the counter (top-left, below the coordinates). The counter also resets when you change input direction. It is just for convenience.
- Press SELECT to return to the level selection screen. You must return to level selection in order for the Swadge to save your progress.
Turning on “Guides” in the options menu will tint the selected row/column, making the game easier to see. It also shows you the width or height of the group of blocks the cursor is hovering over, on the right/bottom.
Clues
The first step to being able to fill in a puzzle from a given clue is to be able to determine what the clues would be for an already filled puzzle.
The clues work by rows and by columns, independently. The numbers to the left of a single row are the clue for that row, and the numbers above a column are the clues for just that column.
Each number in a clue represents a connected series of blocks. There must be at least one gap between the blocks.
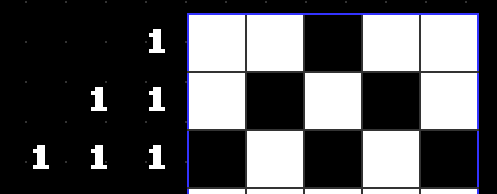
Below, the top clue [1] could be in any of the spaces. But the bottom clue [1 1 1] can only be filled in as shown, since there must be at least one empty space between the blocks.
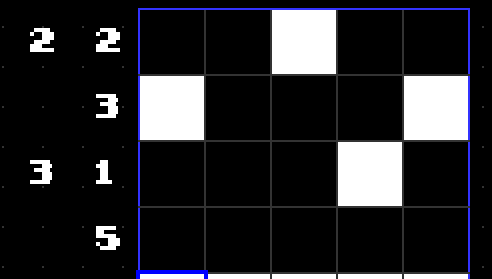
Larger numbers tell us the number of blocks that are connected in that row or column. The clues are in the order their respective blocks appear in. Below, the [3 1] clue can not be filled in the opposite way (flipped horizontally), since the 3 is to the left of the 1.
Note that the bottom clue, [5], is the same as the width of the puzzle. There is only one possible solution for that row – all of the blocks must be filled in. It’s common to start with the clues that are the same size as puzzle.
Below is the same as above, but with the connected block groups outlined in red. By numbering the sequence of connected blocks, we end up with the clue. Solving a picross puzzle is going the other way, starting with the clue and filling in the puzzle.
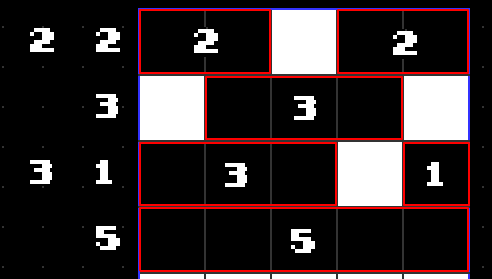
The vertical clues are exactly the same as the horizontal clues, but going from top to bottom.
Now you’re ready to start solving picross puzzles! I encourage you to get started and try a bit before reading through. The rest of this page highlights a few useful tips and techniques, but it will be more helpful if you have already tried one or two.
Techniques for Solving
There are many tips and techniques for solving picross puzzles, this page only outlines some of the most common.
Overlaps
The primary method is to examine “overlaps”. Considering every possible way a row could be filled in, are there any blocks that must be filled in, or must be empty.
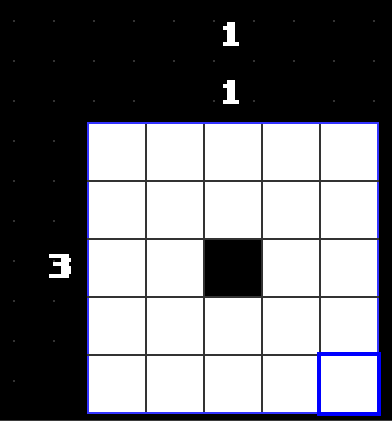
Let’s say we have a puzzle that’s 5 blocks wide, and we have the clue “3”.
Here is every possible way the block might be filled in.
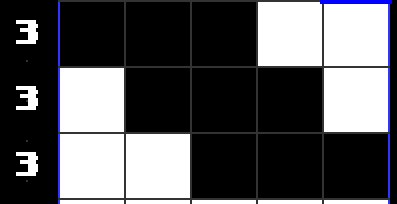
Note that in all of the possibilities, the center block is filled in. This means that even though we don’t know where all the blocks go, we do know that we can fill the center block in.
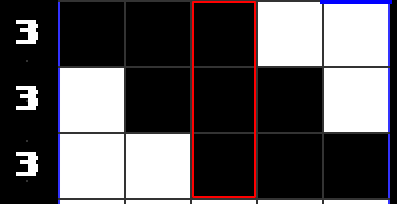
When solving, we would fill that block in, and then check the column to see if this uncovered anything else.
Overlaps are useful on larger puzzles too. Here’s another example showing every possible way the clue [1 5] could be filled in on a 10 block wide puzzle.
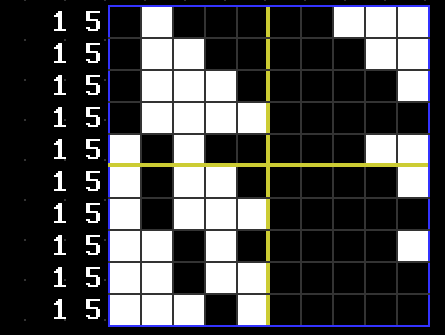
Here we have two blocks we can fill in. No matter what the solution is, these blocks are filled.
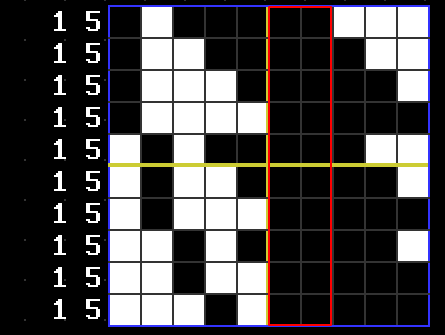
Which leaves us with the following:

When you are considering overlaps, you often don’t need to consider every single possible position, just the left-most and right-most positions (or top-most and bottom-most)
Mark Known Empties
Let’s say we just used the above trick to fill in the following clue.
I’ve erased the other clues.
The clue for the third column is [1 1]. We don’t know if the filled in block is part of the first 1 or the second 1 (i.e.: above or below the other block). But we do know it is a 1 block. It cannot have any connected blocks to either side of it. Let’s mark them as empty by pressing B on the Swadge.
Marking empties is critical to solving larger puzzles. It’s not uncommon that the only next step towards the solution is in the spaces you don’t fill, rather than the ones that you do.
If you fill out a row such that it’s clue matches, you should go in and mark all of the blank spaces as empty. Doing so will help you make deductions elsewhere. You will notice that the clues fade when you have correctly solved them, but they fade more when you solve them, and mark all of the remaining spaces as empty.
Filling Empty Gaps
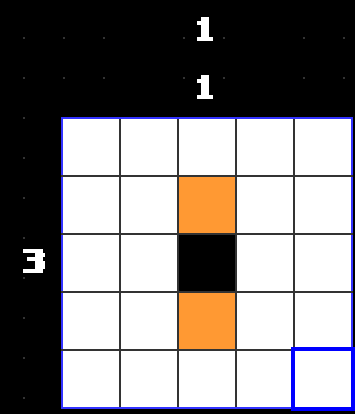
In the below example, we have a row with the hint [3]. Let’s say we know from other clues that the following squares are empty, marked orange.

Consider the spaces to the left and the right of those squares. The 3 block could not possibly fill in those spaces, because they are only two blocks wide. Let’s mark them as empty.

Now that we know the 3 is in the middle, we can use the ‘overlaps’ technique to in the middle two blocks, as the 3 only has two possible positions, and those blocks are filled in either. Progress!

Splitting & Joining
Let’s say we know the following:

If we look at the block in between the 2 groups, we can deduce that it cannot be filled in. If we did join the groups, it would create a block that is 4 wide, which is larger than either of our clues, and thus impossible. So we know it is empty. Marking it splits the groups.

Joining, on the other hand, is when we can deduce the opposite and connect blocks. Let’s say we know the following:

There is only one clue, and it’s [6]. Because there is only one clue, we know the blocks must be connected.

Here is a more complex example. Let’s say we already know the following.

Lets consider if we don’t join the two blocks we already know.

If that space is empty, then the right block must be 3 connected blocks (because of the clue), and extend to the right. But there isn’t enough room over to that side, because of the empty blocks (highlighted red above),
Knowing that that gap cannot be split (marked empty) we join the blocks.

This gives us the further information that, surrounding this 3 block must be at least one empty. This is due to marking known empties, described above.

And that allows us to find the last clue, as it’s the only remaining possibility.

There are many other techniques to solve puzzles. Explore the Wikipedia page on nonograms for more.